Creating and managing email accounts
This step-by-step tutorial will guide you through creating new email addresses in DirectAdmin.
Step 1: Log into DirectAdmin
Section titled “Step 1: Log into DirectAdmin”- Open your web browser and navigate to your DirectAdmin URL (typically yourdomain.com:2222 or yourserver.com:2222) Enter your username and password Click the “Login” button
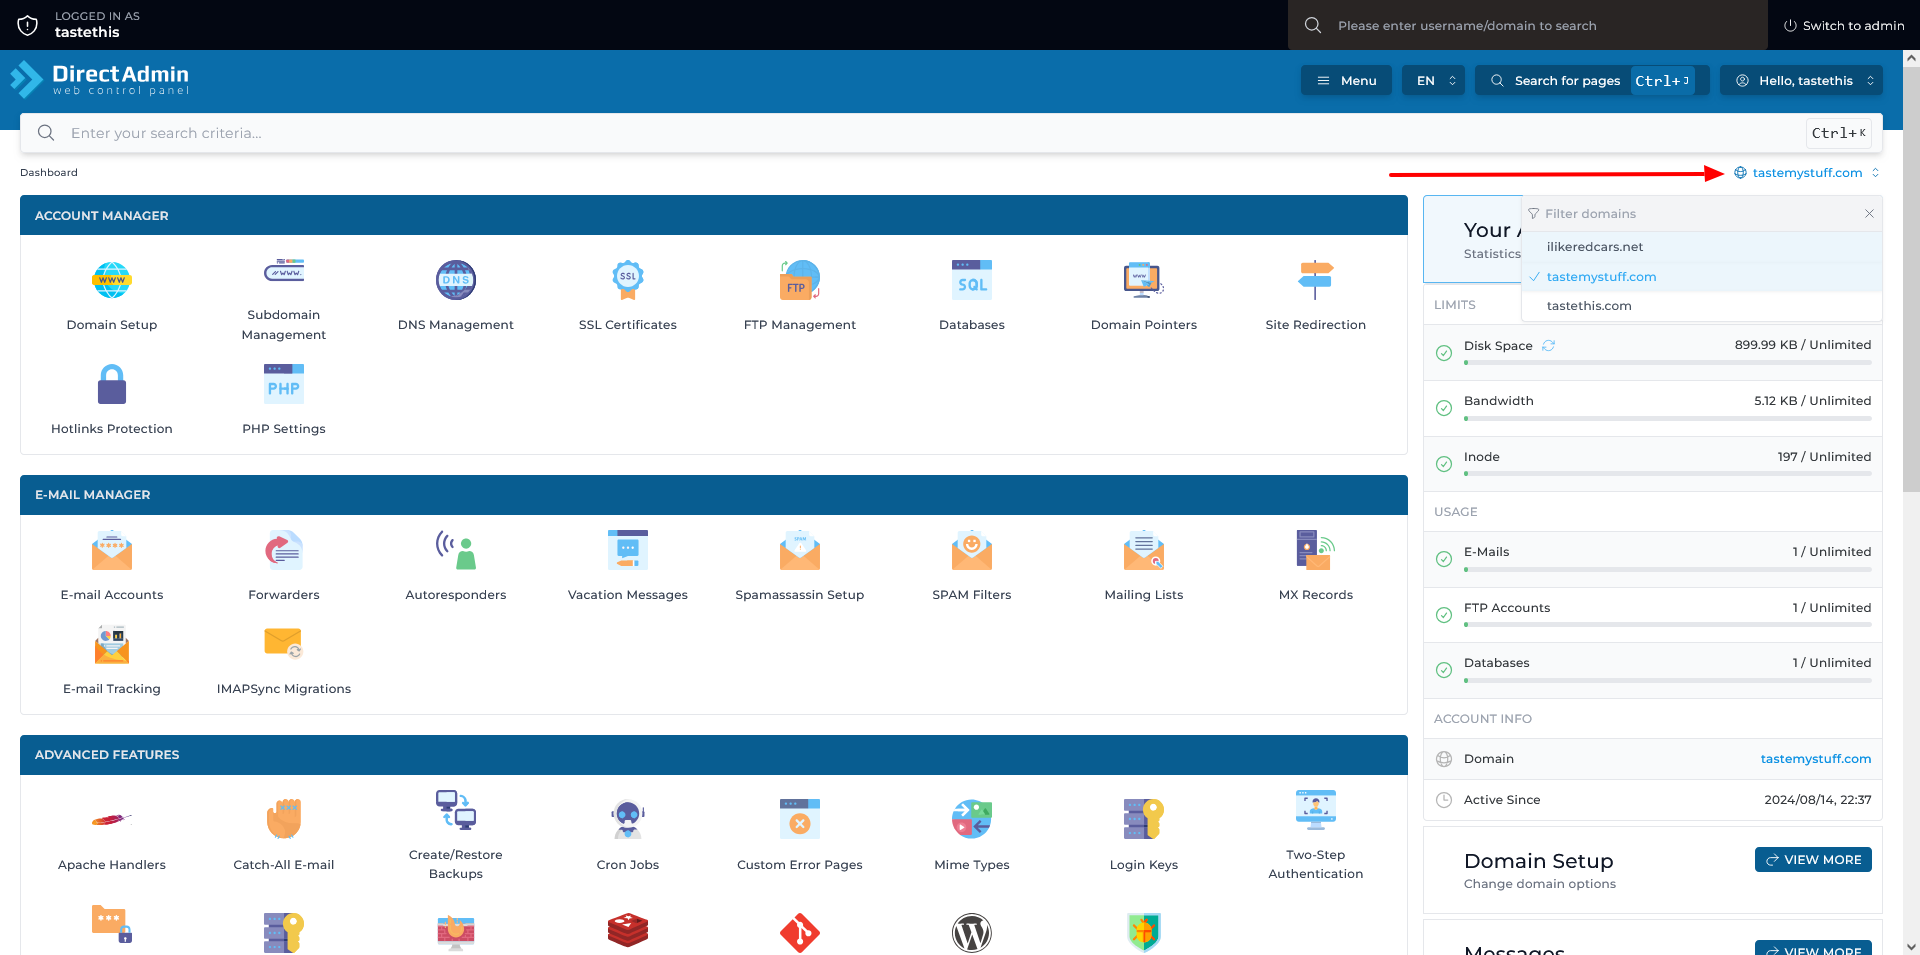
Step 2: Choose the correct domain name
Section titled “Step 2: Choose the correct domain name”- Once logged in, if you have more than one domain name, make sure you have selected the domain name you want to create emails for as per the image below. If you have registered the domain but not yet added it, please use this Tutorial to Learn how to add an add-on domain to your direct admin control panel.
Step 3: Access Email Management
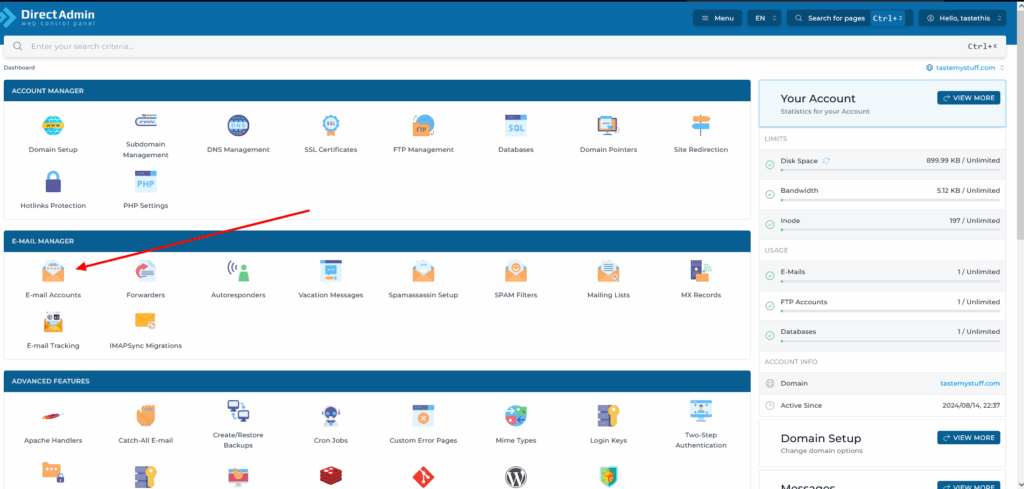
Section titled “Step 3: Access Email Management”- Once you have selected the correct domain, locate the “E-Mail Manager” section on your main dashboard Click on “E-Mail Accounts”
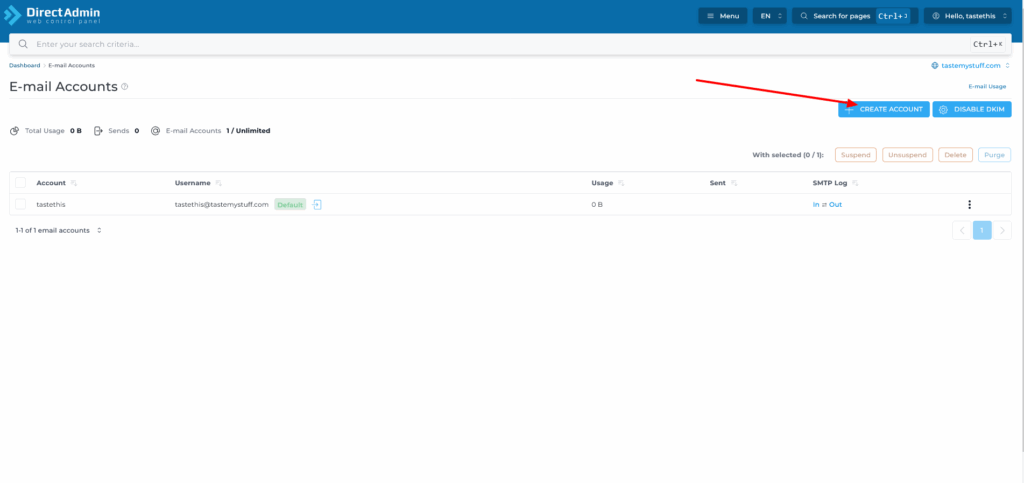
Step 3: Create New Email Account
Section titled “Step 3: Create New Email Account”- On the nest page, click on create new account as per the image below
Step 4: Fill in account details
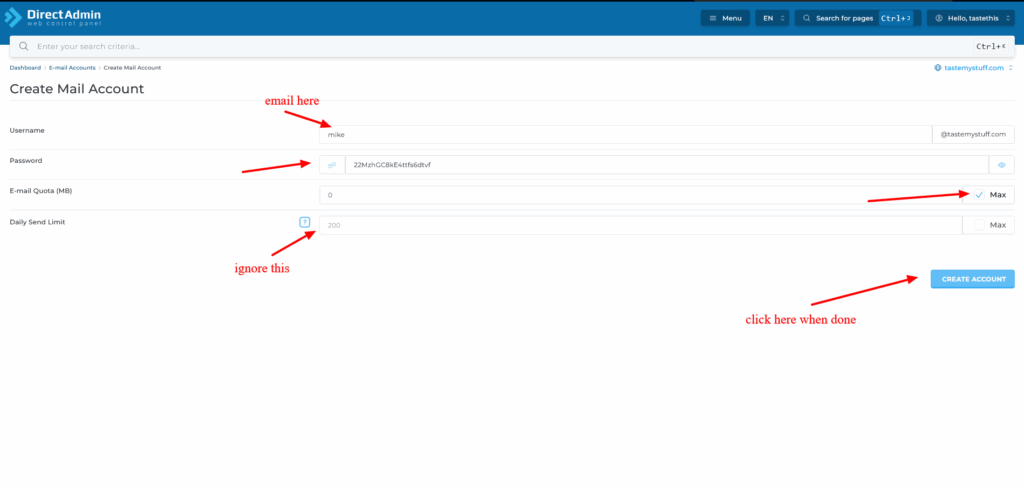
Section titled “Step 4: Fill in account details”On the create E-Mail Accounts page, you have to fill in the following
- Username : Enter the desired email address username (the part before the @ symbol)Example: If you want john@yourdomain.com, enter john
- Create a strong password for this email account
- Use a combination of uppercase, lowercase, numbers, and special characters
- Make it at least 8 characters long
- Set the mailbox size limit (in MB)
- Enter the maximum amount of storage you want for this email account
- Common values: 1000 (1GB), 2000 (2GB), or tick Max for unlimited, meaning it will grow to fill the disk space of the hosting account.
 That’s it, you’re done, if you want to set up your email in your mobile client, Here is a tutorial on how to setup email on outlook.